1080p dash cams capture clear footage‚ offering crucial evidence in incidents. They’re increasingly popular for safety and peace of mind while driving‚ providing detailed recordings.
What is a 1080p Full HD Dash Cam?
A 1080p Full HD dash cam is a small‚ vehicle-mounted camera that continuously records high-definition video while you drive. “1080p” signifies a resolution of 1920×1080 pixels‚ delivering significantly sharper and more detailed footage compared to lower-resolution cameras. This clarity is vital for capturing license plates‚ road signs‚ and other crucial details in the event of an accident or incident.
Unlike standard cameras‚ dash cams are designed for the harsh automotive environment‚ withstanding temperature fluctuations and vibrations. They typically feature a wide-angle lens to maximize the field of view and loop recording to automatically overwrite older footage‚ ensuring continuous operation.
Why Choose a 1080p Dash Cam?
Opting for a 1080p dash cam provides several key advantages. The superior video quality offers undeniable proof in case of accidents‚ potentially resolving disputes and simplifying insurance claims. Detailed footage can clearly show what happened‚ protecting you from fraudulent claims. Beyond accidents‚ dash cams deter reckless driving and vandalism when parked‚ especially those with parking monitoring features.
Furthermore‚ a 1080p resolution ensures readability of crucial details like license plates and road signs‚ even during playback. It’s a relatively inexpensive investment offering substantial peace of mind and potential financial savings.

Setting Up Your Dash Cam
Proper setup is crucial for optimal performance. This involves secure mounting‚ correct power connection‚ and compatible memory card installation for reliable recording.
Initial Installation and Power Connection
Begin by carefully unpacking your 1080p dash cam and verifying all components are present. Connect the provided power cable to the dash cam’s power port and then to your vehicle’s cigarette lighter or dedicated power socket. Ensure a secure connection to avoid interruptions during recording.
Some dash cams offer hardwiring kits for a cleaner installation‚ connecting directly to the vehicle’s fuse box. Always consult your vehicle’s manual or a professional for hardwiring. Once powered on‚ the dash cam should initiate‚ displaying the live view on its screen. Verify the date and time are correct‚ as these are crucial for incident documentation.
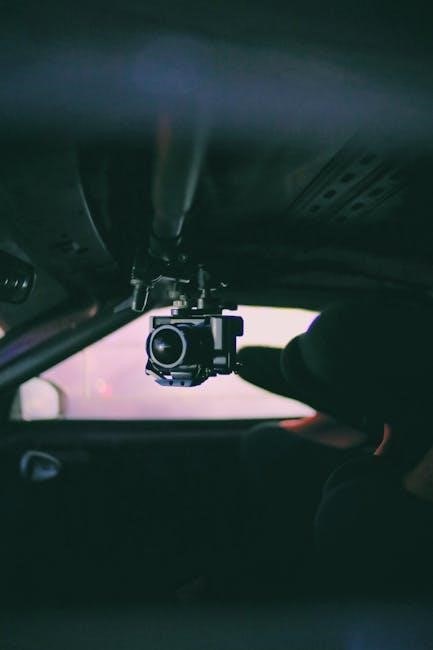
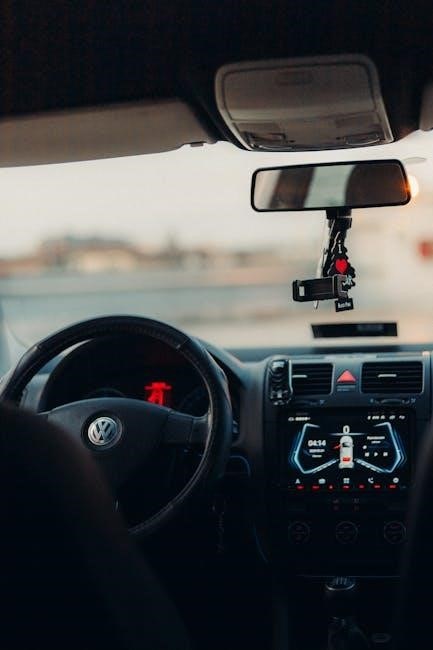
Mounting the Dash Cam Correctly
Proper mounting is essential for optimal recording. Utilize the provided suction cup or adhesive mount‚ ensuring the surface is clean and dry before attachment. Position the dash cam behind your rearview mirror‚ avoiding obstruction of your driving view.
Angle the camera to capture a wide field of view of the road ahead. Avoid direct sunlight exposure‚ which can cause glare and affect video quality. Secure the power cable discreetly along the headliner and down to the power source‚ tucking it away to prevent tripping hazards. Regularly check the mount’s security to prevent the camera from detaching during travel.
Memory Card Installation and Compatibility
Insert a microSD card into the designated slot‚ ensuring it’s compatible with your dash cam – typically up to 128GB or 256GB. Check your dash cam’s manual for specific card class recommendations (Class 10 or UHS-I U3 are common).
Format the card within the dash cam’s settings before first use; this optimizes performance. Avoid using cards already containing data. Regularly format the card to maintain recording efficiency. A faulty or incompatible card can cause recording errors or device malfunction‚ so choose a reputable brand for reliable performance and data security.
Understanding Dash Cam Features
Key features include loop recording‚ G-sensor impact detection‚ and parking monitoring. These enhance functionality‚ ensuring continuous protection and detailed incident documentation while driving.
Loop Recording Explained
Loop recording is a vital dash cam function that automatically overwrites the oldest footage when the memory card is full. This ensures continuous recording without manual intervention. The dash cam seamlessly records in a continuous cycle‚ capturing new events while discarding the earliest files.
Users can typically adjust the loop recording segment length – common options include 1‚ 3‚ 5‚ or 10-minute intervals. Shorter segments provide more detailed footage‚ while longer segments maximize recording time. Importantly‚ footage involved in an impact event (detected by the G-sensor) is usually protected from being overwritten‚ preserving crucial evidence.

G-Sensor Functionality and Impact Detection
The G-sensor (gravity sensor) is a crucial feature in dash cams‚ detecting sudden impacts or changes in motion‚ like a collision or hard braking. When triggered‚ the G-sensor automatically locks and saves the current footage‚ preventing it from being overwritten by loop recording.
Sensitivity levels are usually adjustable‚ allowing users to customize the G-sensor’s responsiveness. Higher sensitivity detects even minor bumps‚ while lower sensitivity requires a more significant impact to activate. Properly configured‚ the G-sensor provides vital evidence in the event of an accident‚ offering valuable documentation for insurance claims or legal purposes.
Parking Monitoring Mode – How it Works
Parking Mode utilizes the dash cam’s G-sensor to detect impacts or motion while your vehicle is parked and turned off. This feature provides surveillance‚ recording any activity around your car‚ potentially capturing vandalism or hit-and-run incidents.
Most dash cams require a hardwire kit for continuous operation in parking mode‚ as they draw power from the car’s battery. Some models use a time-lapse feature to conserve power. When motion or impact is detected‚ the camera activates and records a short clip‚ safeguarding your vehicle even when you’re away.

Navigating the Dash Cam Interface
Dash cam interfaces vary‚ but generally include menu options for settings like resolution‚ date/time‚ and loop recording. Familiarize yourself with these controls!
Menu Options and Settings Overview
Navigating the menu is key to customizing your dash cam. Common options include video resolution (1080p‚ or potentially higher)‚ date and time adjustments for accurate event stamping‚ and loop recording settings to manage file storage.

You’ll also find options for G-sensor sensitivity‚ parking mode activation‚ and potentially Wi-Fi settings for smartphone connectivity. Explore the menu to understand each feature’s function. Some dash cams offer brightness and contrast adjustments for optimal video quality. Don’t forget to check language settings and potentially screen saver options. Regularly reviewing these settings ensures your dash cam operates as intended‚ capturing crucial footage with your preferred configurations.
Adjusting Video Resolution and Quality
Resolution dictates clarity; 1080p (1920×1080) is standard‚ but some dash cams offer higher options. Increasing resolution enhances detail‚ crucial for identifying license plates or road signs. However‚ higher resolutions demand more storage space on your memory card.
Quality settings often include bitrate control. A higher bitrate means more data per second‚ resulting in a sharper‚ more detailed video‚ but also larger file sizes. Experiment to find a balance between quality and storage capacity. Consider the lighting conditions; HDR mode (if available) improves footage in high-contrast situations. Regularly check your settings to ensure optimal recording quality for your driving environment.
Date and Time Settings
Accurate date and time stamping is vital for evidence validity. Access these settings through your dash cam’s menu. Ensure the time zone is correctly configured to match your location; incorrect settings can cause discrepancies in event timestamps. Most dash cams allow manual setting or automatic synchronization via GPS.
GPS synchronization is highly recommended for precision. Verify the date format (MM/DD/YYYY or DD/MM/YYYY) aligns with your preference. Regularly check these settings‚ especially after power outages or battery replacements‚ as the default settings may revert. Correct date and time information is crucial for legal and insurance purposes following an incident.

Troubleshooting Common Issues
Common problems include recording failures‚ poor video quality‚ and memory card errors. Addressing these promptly ensures your dash cam functions optimally and reliably.
Dash Cam Not Recording
If your dash cam isn’t recording‚ first verify the power connection is secure. Ensure the device receives sufficient power‚ especially during vehicle startup. Check the memory card; it might be full‚ improperly inserted‚ or corrupted. Formatting the card (after backing up any important footage!) can often resolve this.
Next‚ confirm loop recording is enabled in the settings. Some dash cams halt recording when the card is full without loop recording active. Also‚ examine the date and time settings – incorrect settings can sometimes interfere with proper operation. Finally‚ a firmware update might address software glitches preventing recording. Consult the manufacturer’s website for the latest firmware.
Poor Video Quality – Causes and Fixes
Subpar video quality can stem from several issues. A dirty lens is a common culprit – regularly clean it with a microfiber cloth. Insufficient lighting conditions also impact clarity; consider a dash cam with HDR (High Dynamic Range) for better low-light performance.
Verify your resolution setting is at 1080p or higher. Lower resolutions produce noticeably poorer footage. Check the memory card’s write speed; a slow card can cause frame drops and reduced quality. Finally‚ ensure the dash cam’s lens is properly focused. Some models allow manual focus adjustment for optimal clarity.
Memory Card Errors and Solutions
Memory card issues are frequent dash cam problems. “Card Full” errors necessitate formatting or upgrading to a higher capacity card. “Card Error” messages often indicate corruption; try formatting the card within the dash cam (this is crucial!). If formatting fails‚ the card may be damaged and require replacement.
Ensure you’re using a compatible card – check your dash cam’s manual for supported types and speed classes (usually Class 10 or UHS-I). Avoid cheap or counterfeit cards‚ as they’re prone to failure. Regularly back up footage to prevent data loss if a card malfunctions.

Advanced Features and Settings
Explore GPS logging for speed and location data‚ Wi-Fi for smartphone connectivity‚ and HDR mode to enhance image quality in varying light conditions.
GPS Logging and Speed Display
Integrated GPS functionality within your 1080p dash cam precisely records your vehicle’s location and speed during recording. This data is often overlaid directly onto the video footage‚ providing valuable context in the event of an incident.
Accessing this information typically involves connecting the dash cam to a computer via USB or utilizing a dedicated smartphone app (if Wi-Fi enabled). The GPS data can be crucial for insurance claims or legal proceedings‚ offering irrefutable proof of speed and location. Ensure your dash cam has a clear view of the sky for optimal GPS signal reception. Regularly check for GPS signal strength within the dash cam’s settings.
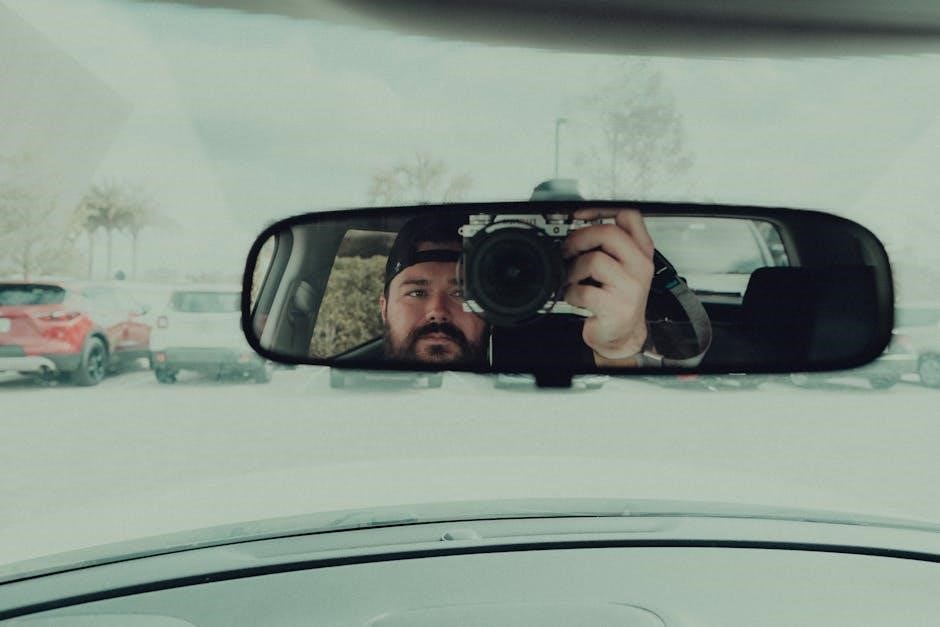
Wi-Fi Connectivity and Smartphone App Integration
Many 1080p dash cams now feature built-in Wi-Fi‚ enabling seamless connection to your smartphone. This connectivity unlocks a range of convenient features‚ including live viewing‚ remote control‚ and easy video/photo downloading. Download the manufacturer’s dedicated app to your smartphone (iOS or Android).
Once connected‚ you can preview live footage‚ adjust settings‚ and instantly download recordings to your phone for sharing or backup. Some apps also offer firmware updates directly through the connection. Ensure your dash cam and smartphone are within Wi-Fi range for optimal performance. Check app permissions for full functionality.
HDR (High Dynamic Range) Mode Explained
HDR (High Dynamic Range) in a 1080p dash cam significantly improves video quality‚ especially in challenging lighting conditions; Unlike standard recording‚ HDR balances bright and dark areas within the frame‚ preventing overexposure or underexposure. This results in clearer footage during sunrise‚ sunset‚ or when transitioning between bright sunlight and shaded areas.
When enabled‚ HDR captures more detail in both highlights and shadows‚ providing a more realistic and comprehensive view of the road. Look for dash cams with automatic HDR functionality for seamless operation. While it may slightly reduce low-light performance‚ the benefits in varied lighting are substantial.
Maintaining Your Dash Cam
Regular maintenance ensures optimal performance. Clean the lens frequently‚ update firmware when available‚ and manage stored data to prevent issues and prolong lifespan.
Cleaning and Care Instructions
Maintaining a clean dash cam is vital for optimal video quality. Regularly wipe the lens with a soft‚ microfiber cloth to remove dust‚ fingerprints‚ and smudges. Avoid harsh chemicals or abrasive cleaners‚ as these can damage the lens coating.
For stubborn dirt‚ lightly dampen the cloth with distilled water. Ensure the dash cam is powered off before cleaning. Periodically check the mounting mechanism to ensure it’s secure and doesn’t obstruct your view. Inspect the cables for any signs of wear or damage. Store the dash cam in a cool‚ dry place when not in use‚ protecting it from extreme temperatures and humidity. Proper care extends the lifespan and ensures reliable performance.
Firmware Updates – Why and How
Regular firmware updates are crucial for your 1080p dash cam’s performance. Updates often include bug fixes‚ improved stability‚ and new features‚ enhancing overall functionality. Manufacturers release these updates to address vulnerabilities and optimize the device.
To update‚ typically download the latest firmware from the manufacturer’s website and follow their instructions. This usually involves formatting a microSD card‚ copying the firmware file onto it‚ and inserting the card into the dash cam while powered on. Always ensure a stable power supply during the update process to prevent data corruption. Check the manufacturer’s support page for detailed guidance specific to your model.
Long-Term Storage and Data Management
Efficient data management is vital with 1080p dash cams‚ as footage can quickly fill up storage. Regularly review and delete older recordings to free up space on your microSD card. Consider using a larger capacity card for extended recording time.
Back up important footage to a computer or cloud storage for safekeeping. Organize files by date for easy retrieval. Many dash cams offer smartphone app integration for convenient viewing and downloading. Periodically format the microSD card to maintain optimal performance. Avoid constantly deleting small files‚ as this can fragment the storage and slow down the system.

Legal Considerations
Understand local laws regarding dash cam usage‚ including audio recording and placement. Privacy regulations vary‚ so research before installation and operation.
Dash Cam Laws and Regulations
Navigating the legal landscape of dash cam usage is crucial. Regulations differ significantly by location‚ impacting where you can mount the camera and whether audio recording is permitted. Some jurisdictions prohibit obstructing the windshield‚ while others have specific rules about displaying recorded footage as evidence.
Always check your state and local laws before installing and operating a dash cam. Be aware of privacy concerns; recording audio without consent may be illegal in certain areas. Understanding these regulations ensures compliance and avoids potential legal issues. Prioritize responsible usage and respect for privacy rights while benefiting from the security a dash cam provides.
Privacy Concerns and Best Practices
Addressing privacy is paramount when using a dash cam. While providing security‚ they also record potentially sensitive information about other drivers and pedestrians. Avoid intentionally recording private conversations or focusing on individuals not involved in traffic incidents.
Blurring license plates of vehicles not directly involved can enhance privacy. Inform passengers about the recording‚ and comply with local laws regarding audio recording; Securely store footage and limit access to prevent misuse. Responsible dash cam operation balances personal safety with respecting the privacy of others‚ fostering trust and ethical usage.
Leave a Reply